Quick Links
For new IRM users, to begin with, you are recommended to learn about the basic concepts of IRM:
Introduction
IRM (Information Rights Management) is a technology that allows individuals to set access permissions to files and email messages (including attachments). ITS adopted an IRM solution based on Microsoft Purview Information Protection (PIP). It helps prevent sensitive information from being printed, forwarded, or copied by unauthorized persons. By using IRM, access permission can be set in a file or an email and unintended recipients will not be able to access the files even they are sent to the wrong persons.
The following types of control can be set by the document owners (or senders):
- restrict documents from copy, edit or print
- in-place protect files on local disk storage
- set expiry date on document access
Scope of Support on the use of IRM
Staff members and RPG students can use IRM to send and read protected emails and files.
Prerequisite
- Microsoft Office 2013 or above (requires sign in using @hku.hk account).
- Install “PIP” (“Purview Information Protection” client developed by Microsoft) for protecting and accessing files with protection on Windows.
- Install “PIP” (“Purview Information Protection” viewer developed by Microsoft) for accessing files with protection on Android and iOS devices.
- Install “RMS sharing application” (“Rights Management sharing application” developed by Microsoft) for accessing files with protection on Mac PCs.
- PIP client for Windows
- PIP Viewer for Windows (for reading AIP protected non-MS Office documents only)
- RMS sharing application for Mac OS X
- AIP Viewer for iOS/iPadOS Devices
- AIP Viewer for Android
Supported Platforms
The table below illustrates the supported operating systems and email systems:
| Protect file using PIP client | Open file protected by PIP client/RMS sharing application | Write an email with protection | Read an email with protection | |
|---|---|---|---|---|
| Windows 10/11 | Yes | Yes (PIP client or PIP Viewer is required for reading non-MS Office files) | Yes, using Outlook 2013/2016 or OWA | Yes, using Outlook 2013/2016 or OWA |
Mac OS X (version 10.9 or above) | Not supported | Yes (RMS sharing application is required) | Yes, using Outlook 2016 for Mac or OWA | Yes, using Outlook 2016 for Mac or OWA |
| Android | Not supported | Yes (AIP Viewer is required) | Not supported | Yes (AIP Viewer is required) |
| iPhone/iPad (iOS/iPadOS 11.0 or above) | Not supported | Yes (AIP Viewer is required) | Yes, using OWA via web browser | Yes (AIP Viewer is required) |
* OWA stands for “Outlook Web Access” which is the webmail interface available under MyEmail tab of HKU Portal or webmail.hku.hk.
The following sections summarize different ways and levels of protection that can be set using IRM and the supported file types:
Ways of Protection
(Note: Microsoft AIP labels are no longer supported under the new AIP client that ITS is supporting from 4 Jan 2021 onwards.)
Protecting Documents Using Microsoft PIP Custom Permissions
By using “Custom Permissions”, different levels of protection can be set for sending protected documents to HKU staff. For example, if you choose the moderate level permission “Reviewer”, the recipients can view, edit, reply, forward and save the document, but not copy and print.
| Level of Security Protection | Permission Level | Access Permission Other Than the Owner | |||||
|---|---|---|---|---|---|---|---|
| View | Edit (for MS Office documents) | Reply | Copy (for MS Office documents) | Save | |||
| Highest | Only for me | X | X | x | x | x | x |
| High | Viewer | ✔ | X | x | x | x | x |
| Moderate | Reviewer | ✔ | ✔ | ✔ | x | x | ✔ |
| Lowest | Co-author | ✔ | ✔ | ✔ | ✔ | ✔ | ✔ |
| Nil | Co-owner (recipient will have full control of the document, including unprotect the document) | ✔ | ✔ | ✔ | ✔ | ✔ | ✔ |
Protecting Email Message and Attachments
The “Do Not Forward” feature allows you to protect an email message which the recipients can view, edit, reply and save the email, but not copy, forward and print it.
NOTE: You can attach any files protected by PIP in your email. If you are attaching an Microsoft Office file without protection, the “Do Not Forward” restriction will automatically be applied to the attached file.
| Template | View | Edit (for MS Office attachment without protection) | Reply | Copy (for MS Office documents without protection) | Forward (in email) | Save | |
|---|---|---|---|---|---|---|---|
| Do Not Forward | ✔ | ✔ | ✔ | x | x | x | ✔ |
Suggested Protection to Use
| Protection Method to Use | Remarks | |
|---|---|---|
| Send a protected email without attachment | Do not forward | Protection will be applied to email message. |
| Send a protected email with attachment (not protected prior to sending) | Do not forward | If your attachment contains Microsoft Office file without any protection, protection configured to the email message will be applied to attachment(s) automatically. |
| Send an email with protected attachment(s) | Custom Permissions using PIP client |
|
| Send a protected email with protected attachment(s) | Custom Permissions using PIP client + Do not forward |
|
| Protect file on hard disk for owner access only | Protect by applying the label “Confidential” or “Restricted” | Original files will be replaced e.g. .txt > .ptxt. |
Please click here for more common usage scenarios.
Types of Files Supported
Types of files supporting full IRM protection protected using PIP:
- Text (.txt) files
- Image files (.jpg/.png/.bmp)
- Microsoft Office (Word/Excel/PowerPoint) files
- Portable document format (.pdf)
Types of files attached to a “Do Not Forward” email message that will be automatically applied with the “Do Not Forward” restriction if the documents are not protected with PIP:
- Word documents (.doc/.docx/.docm/.dot/.dotx/.dotm)
- Excel documents (.xls/.xlsx/.xlsm/.xlt/.xltx/.xltm/.xlsb/.xla/.xlam)
- PowerPoint documents (.ppt/.pptx/.pptm/.pot/.potx/.potm/.pps/.ppsx/.ppsm/.thmx)
- InfoPath files (.xsn)
- XPS documents (.xps)
Notes:
- If an email is sent using “Do Not Forward” with a .pdf file not protected using AIP, only the email will be protected but not the .pdf file.
- If you attach Outlook message files (.msg) to a “Do Not Forward” email message (such as forwarding multiple Outlook messages within one message), the attached messages will not be protected.
| Read Protected Files | Platform | Document | Suggested application to use |
| MAC OS | Protected MS Office documents | MS Office* | |
| Protected PDF documents (.pdf) | Adobe Acrobat Reader Plug-in | ||
| Protected PDF documents by using old AIP client (classic client) (.ppdf) | RMS sharing application | ||
| Protected emails | MS Outlook* | ||
| Windows | Protected MS Office documents | MS Office* | |
| Protected PDF documents (.pdf) | Adobe Acrobat Reader Plug-in or AIP Viewer | ||
| Protected PDF documents (.ppdf) | AIP Viewer | ||
| Protected emails | MS Outlook* | ||
| Protect Files | Windows | MS Office documents | PIP Client |
| PDF or other supported files | PIP Client | ||
| MS Outlook* | |||
| Mac | MS Outlook* |
*no additional application is required to install
Protection and Encryption
- Apply Protection to a File (Windows only, please refer to Point 3 below for PDF files
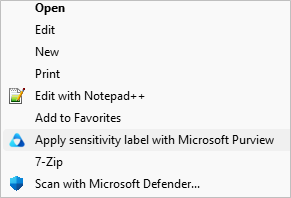
- Right click the target file and select “Apply sensitivity label with Microsoft Purview”.
- The PIP Client will be opened. Check the box “Protect with custom permissions” and select the desired protection from the drop-down menu.
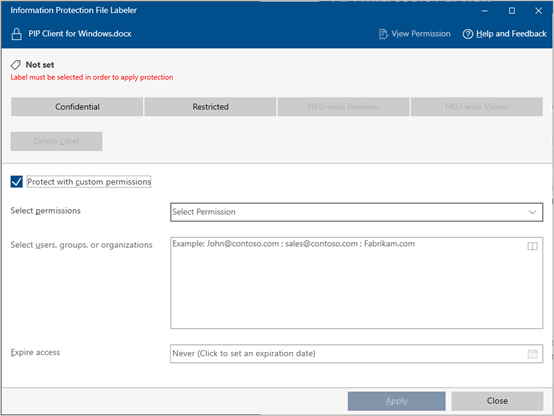

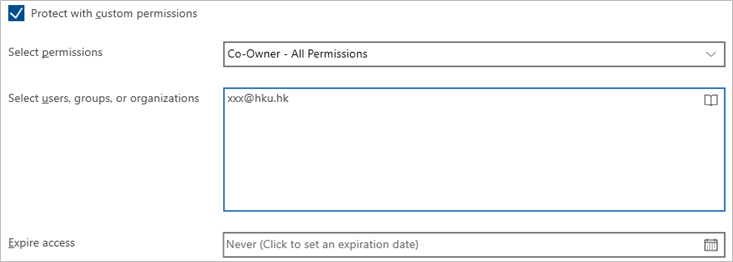
- Under “Select users, groups or organizations”, enter the recipients’ email addresses, email groups or click the icon
 to open the Global Address List to look up and select the recipients.
 - Optional: Under “Expire access”, enter the expiry date of the access right. Recipients cannot access the file after the expiry date.
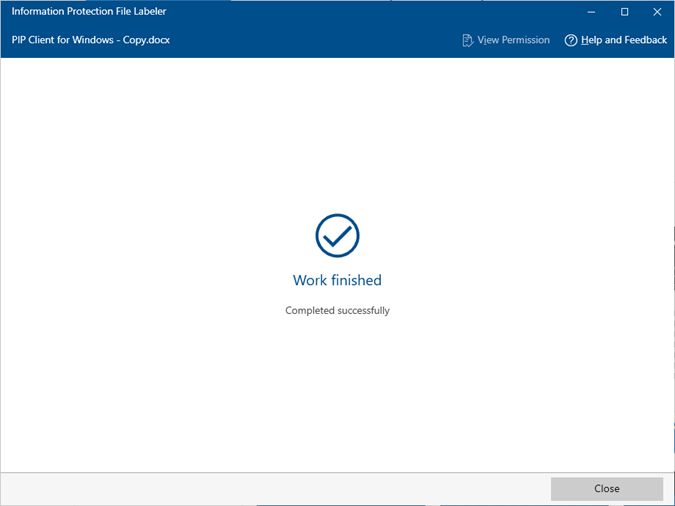
- Click “Apply” to confirm the protection setting.
- Click “Close” to exit the setting page.
- Right click the target file and select “Apply sensitivity label with Microsoft Purview”.
- Remove Protection from a File (Windows only, please refer to Point 4 below for PDF files)
- Right click the protected file and select “Apply sensitivity label with Microsoft Purview”.
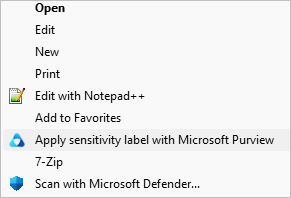
- The PIP Client will be opened. Select “Delete Label” and uncheck the box “Protect with custom permissions” and click “Apply”.
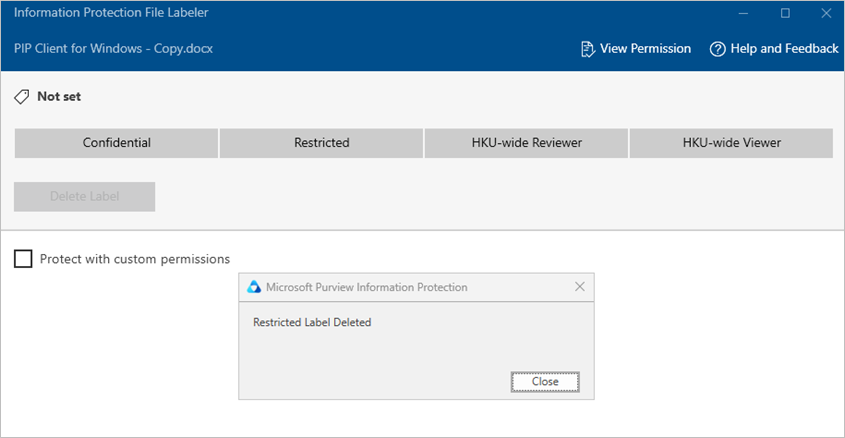
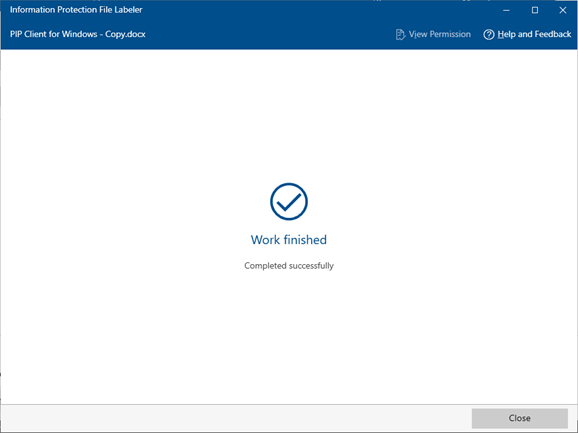
- Click “Close” to exit the setting page.
- Right click the protected file and select “Apply sensitivity label with Microsoft Purview”.
- Apply Protection to PDF Files (Windows Only)
- Right click the PDF file and select “Apply sensitivity label with Microsoft Purview”.
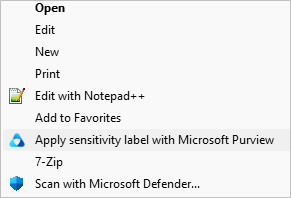
The PIP Client will be opened. Check the box “Protect with custom permissions” and select the desired protection from the drop-down menu.
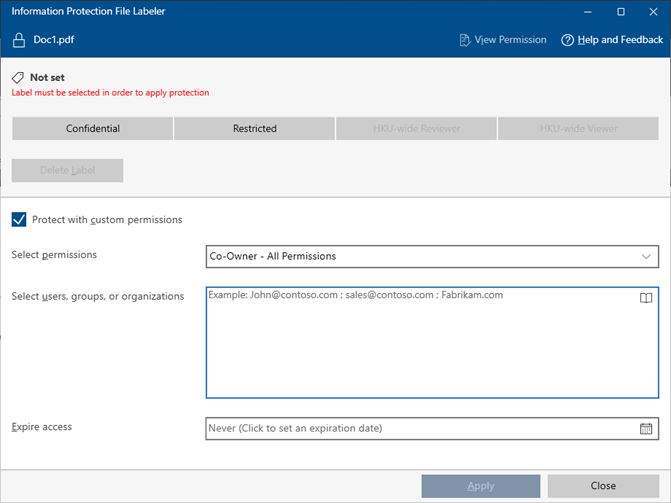
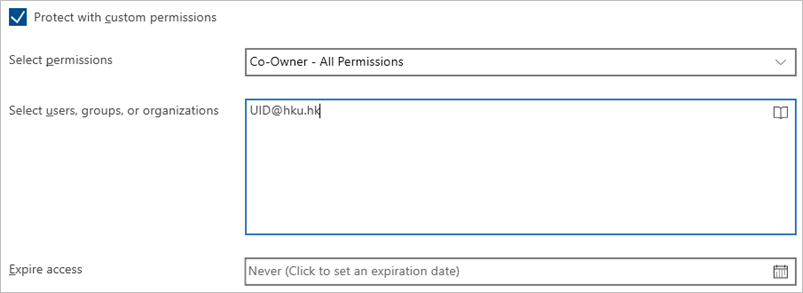
- Under “Select users, groups or organizations”, enter the recipients’ email addresses, email groups or click the icon
 to open the Global Address List to look up and select the recipients.
 - Optional: Under “Expire access”, enter the expiry date of the access right. Recipients cannot access the file after the expiry date.
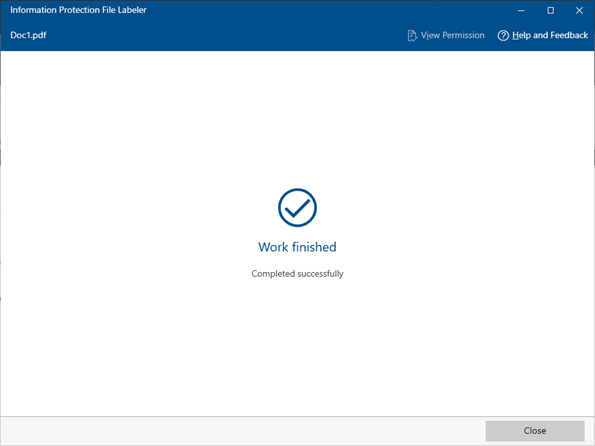
- Click “Apply” to confirm the protection setting.
- Click “Close” to exit the setting page.
- Right click the PDF file and select “Apply sensitivity label with Microsoft Purview”.
- Remove Protection from PDF Files (Windows Only)
- Right click the protected PDF file and t “Apply sensitivity label with Microsoft Purview”.
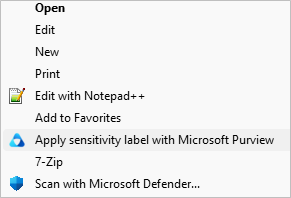
- The AIP Client will be opened. Uncheck the box “Protect with custom permissions” and click “Apply”.
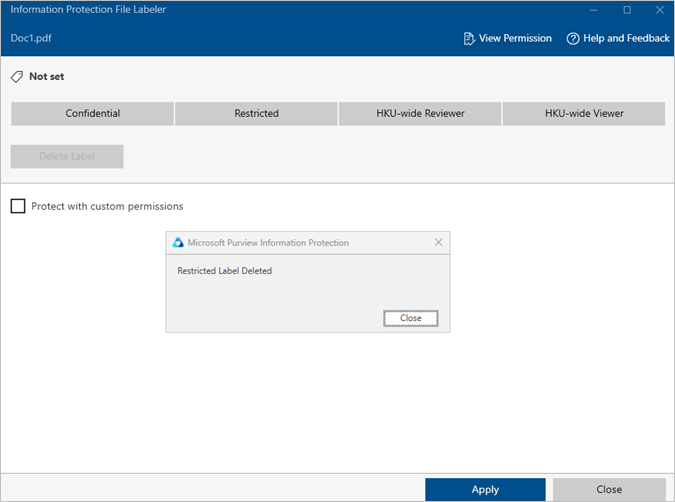
- Click “Close” to exit the setting page.
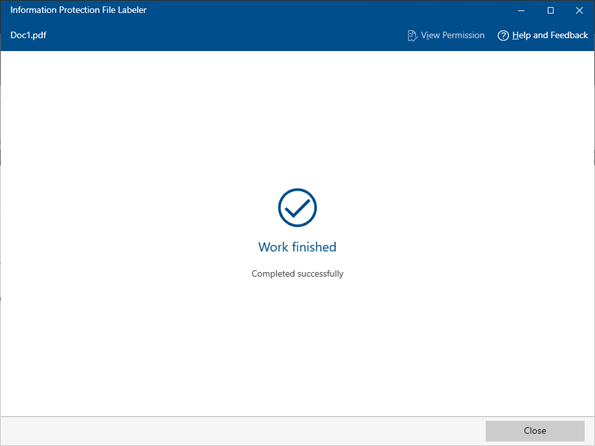
- Right click the protected PDF file and t “Apply sensitivity label with Microsoft Purview”.
- Install Adobe Acrobat Reader Plug-in to Open Protected PDF Files (Windows and Mac OS)
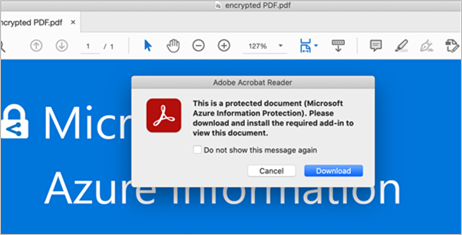
- To open protected PDF files, please download the Microsoft Information Protection (MIP) plug-in for Adobe Acrobat ReaderIf you open a protected PDF file without plug-in, you will see the following alert message:
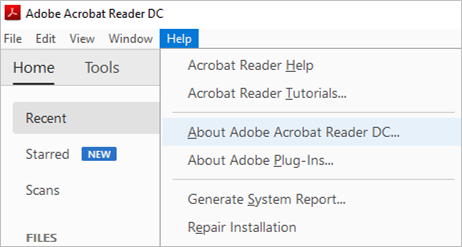
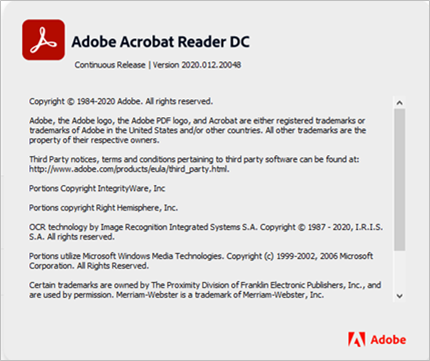
- Check the version of your Adobe Acrobat Reader by clicking Help > About Adobe Acrobat Reader DC… .
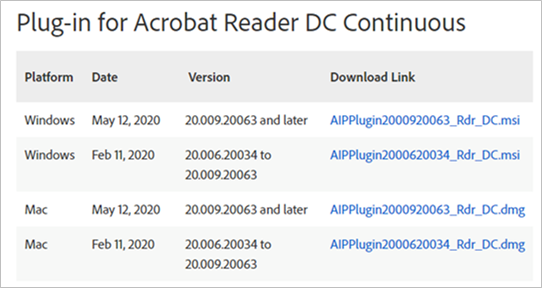
- Download the appropriate version of the plug-in.
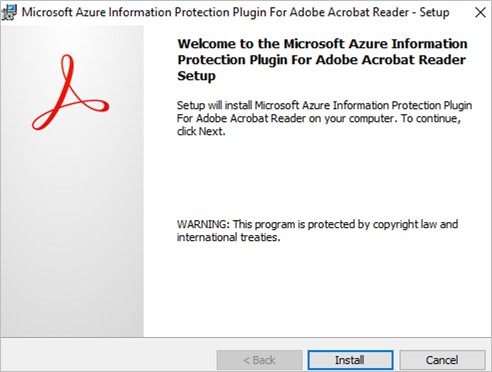
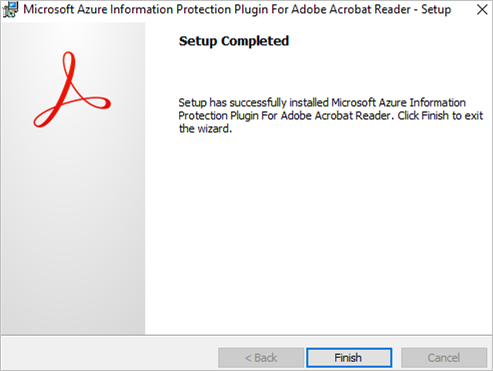
- Run the downloaded file to install the plug-in. Click “Finish” after the setup is completed.
- After installing the plug-in, you will be prompted to enter your email address that is granted with the right to open the file, complete the authentication steps required and click “Accept” to accept the permission.Note: Acrobat Reader only support .PDF file. For previously protected PDF files (.PPDF), please use the PIP viewer (for Windows) or RMS client (for Mac).
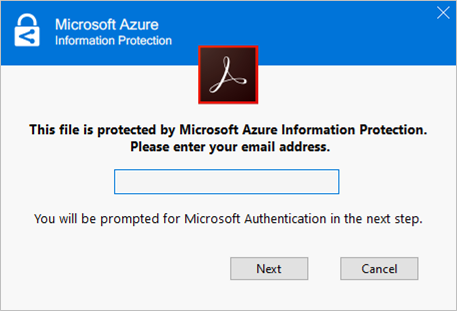
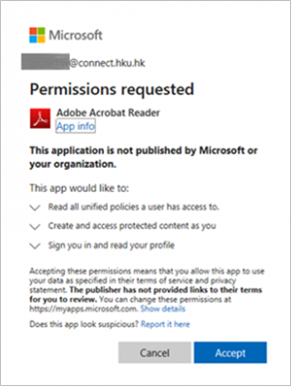
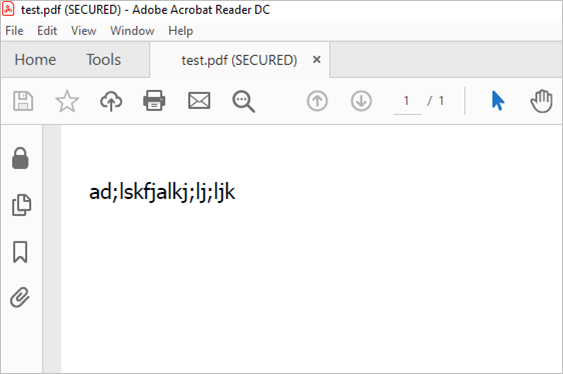
- The protected PDF file will be opened and labelled with (SECURED).
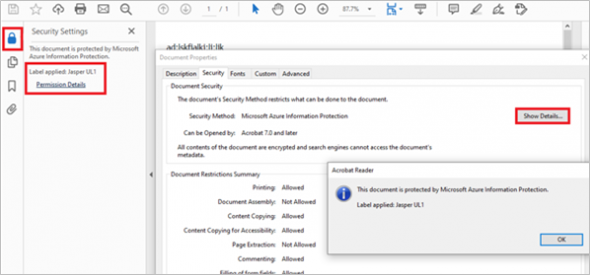
- To check the label details, you can click the following icon and link:
- To open protected PDF files, please download the Microsoft Information Protection (MIP) plug-in for Adobe Acrobat ReaderIf you open a protected PDF file without plug-in, you will see the following alert message:
- Open PPDF File from PIP Client
- Right click the PPDF file and select “Open”.
- The content will be displayed inside the AIP Client.
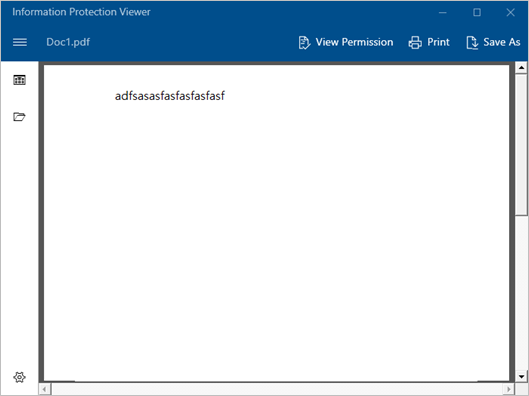
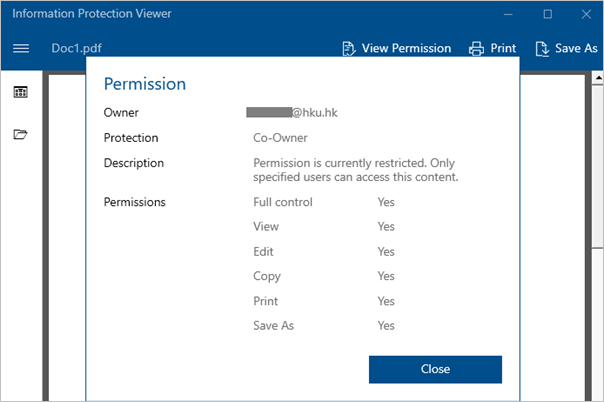
- You can click the “View Permission” button to check the protection details.
- Apply Protection to an Email Using Microsoft Outlook 2013 or Above (Do Not Forward)
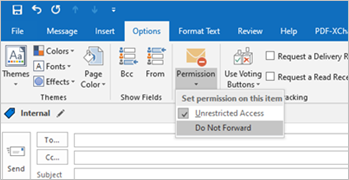
- Under the compose email window, select “Option” > “Permission” > “Do Not Forward”.
- An alert on “Do Not Forward” will be displayed at top of the email.

- To remove “Do Not Forward”, select “Option” > “Permission” > “Do Not Forward” again.
- Under the compose email window, select “Option” > “Permission” > “Do Not Forward”.
Limitations
- The list of platforms and file types supported by IRM can be referred to Sections 4 and 7 above.
- IRM cannot prevent contents from being erased, stolen, corrupted, captured and transmitted by malicious programs or computer viruses. It also cannot prevent restricted contents from being hand-copied or retyped, or prevent a digital photograph or screen capture of the restricted contents from being taken.